

2006 Balloon Project Recap
 Pictures: Camera 1 | Camera 2
November 12, 2006
BackgroundIt's hard to say exactly when I decided to build and launch a high-altitude balloon. I've found diagrams of payloads and control systems that I sketched in notebooks in the 8th or 9th grade. I know now that the designs were mostly unworkable or at least impractical, though I'm sure creating them was still more entertaining than Algebra class, which is undoubtedly what I was supposed to be paying attention to at the time.
I forgot about all that for several years, until I got back into ham radio and APRS. By late 2003 I had my own APRS tracker design, the OpenTracker, up and running. One of the first prototypes flew on a balloon launch put on by a group from Cal Poly, and I've been providing hardware for various ballooning groups ever since.
By early 2005 I'd decided I needed to build and fly my own payload. I knew most of the basics (and I owe a lot of that to folks like Mark Caviezel and Ralph Wallio), and I had most of the pieces on hand, but it still took me about a year to get around to actually launching anything. I finally set a date of November 10 for the launch, and with a hard deadline to meet, things finally started coming together.
Payload Construction
The most difficult piece of the payload was of course the controller board. This component would be responsible for communications, sensors, and camera control. Fortunately I didn't have to start from scratch - the Tracker2, successor to the OpenTracker, was already well into beta testing. The firmware was built on the original OpenTracker code, so many of the critical subsystems had already been thoroughly tested in well over a thousand units at that point. The new code specific to the Tracker2 wasn't quite as polished, but it had still had quite a bit of testing. Additions specific to the balloon launch amounted to only a few dozen lines of code.
 The unit I used was an old revision 'A' prototype board, very possibly the first
one that was ever assembled. Like the OpenTracker, it had built-in sensors for
temperature and battery voltage. It was also capable of responding to remote commands,
acting as a digipeater, and communicating with a GPS in Garmin's proprietary binary
protocol. A quirk of this protocol is that velocity is reported as separate X, Y, and Z
components rather than course and speed. Normally it's an inconvenience because the
Tracker2 has to do some math to calculate course and speed, but in this case it allowed
me to add an instantaneous vertical speed indication to the APRS position report.
The unit I used was an old revision 'A' prototype board, very possibly the first
one that was ever assembled. Like the OpenTracker, it had built-in sensors for
temperature and battery voltage. It was also capable of responding to remote commands,
acting as a digipeater, and communicating with a GPS in Garmin's proprietary binary
protocol. A quirk of this protocol is that velocity is reported as separate X, Y, and Z
components rather than course and speed. Normally it's an inconvenience because the
Tracker2 has to do some math to calculate course and speed, but in this case it allowed
me to add an instantaneous vertical speed indication to the APRS position report.
The power source was simple enough. Lithium batteries are the only common type that work reliably at very low temperatures, and they also happen to be very light and have a higher energy density than just about anything else. Some groups use military surplus D cells, but for simplicity I chose plain old Energizer lithium AAs - eight of them in series, held in a Radio Shack battery holder. My calculations showed that they'd be sufficient for several hours of operation.
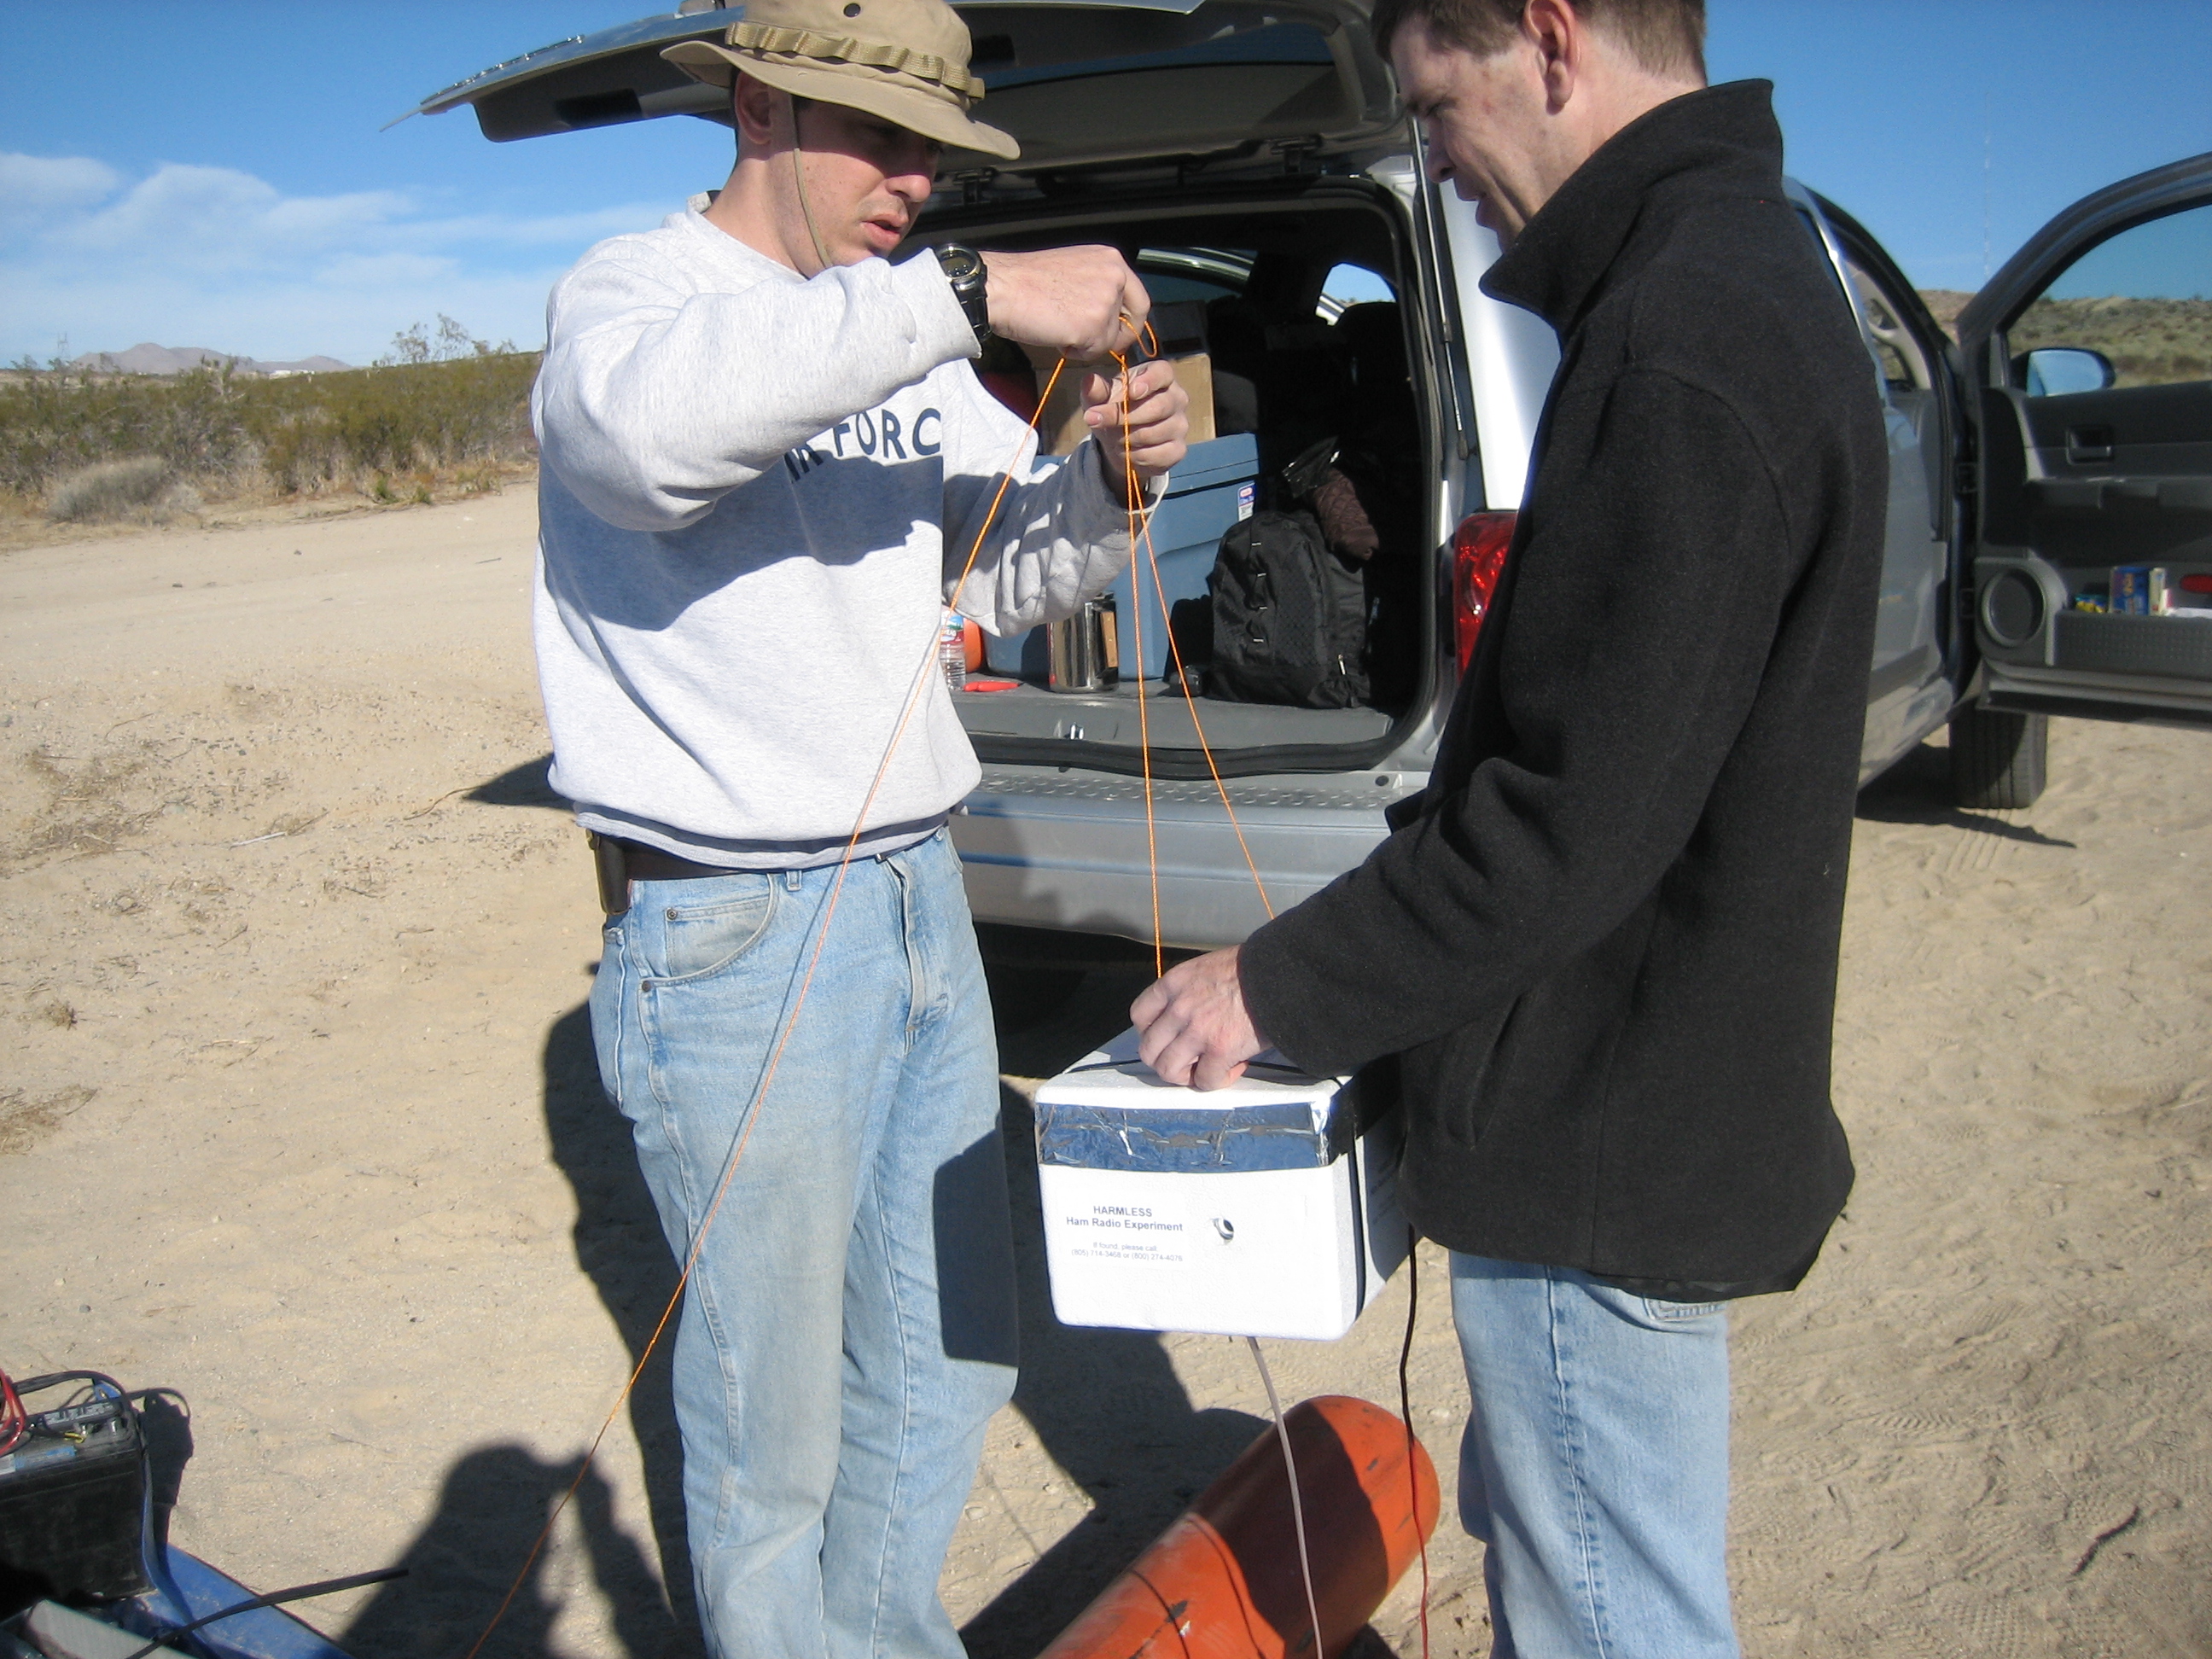
Some months before, I had started trying to assemble a payload housing out of foam board. My construction skills being what they are, I eventually abandoned the attempt and went with an off-the-shelf insulated foam box of the type used to ship small refrigerated items. They're cheap, durable, provide excellent insulation, and are fairly easy to customize.
For the radio, I chose a Realistic HTX-202. I had two of these old bricks kicking around the workshop, both from eBay. I had a much lighter Alinco DJ-S11T available as well, but for various reasons I decided the HTX-202 would be more reliable and less complicated for my first attempt. For starters, unlike the Alinco, the HTX-202 would power on automatically if it happened to lose power momentarily, and the 1-watt output (on low power) would give me plenty of margin in the downlink.
Choosing a GPS receiver was easy. I'm a Garmin reseller, and I carry the GPS 18 LVC precisely because I know it works well at high altitude and has been proven on many balloon flights. I hollowed out a space in the payload's lid for the receiver and taped it in place. Setting it to Garmin binary mode instead of NMEA turned out to be a bit of a hassle, but once I got a power adapter rigged up and figured out the non-intuitive configuration program, it went smoothly enough.
Until I set a jumper wrong on the Tracker2 board, that is. A day before we were set to leave for the launch site, I accidentally fried the installed unit by feeding it 12 volts instead of 5. Fortunately I had more in stock, and the loss only set me back about half an hour and the cost of one GPS receiver. I also managed to draw blood with various pointy bits and sharp edges at least two or three times in the rush to get everything together that day, but when it was time to leave, the payload was ready to go.
A major goal of the project was to bring back pictures. I considered a 35mm film camera, but eventually went with two cheap 2.1 MP digital cameras from Wal-Mart. Modifying them for remote control turned out to be fairly easy. I hooked the required controls up to the Tracker2 board by way of some 2N7000 FETs and added a timer routine to the Tracker2 firmware to handle turning on the cameras and taking pictures.
One camera was mounted facing downward, and the other facing sideways. Each had a 256 MB memory card, which I figured would be enough capacity for an entire flight at a rate of about 3 pictures per minute.
The cameras were cheap - about $40 each - and it shows. The first one I got was unusable right out of the (infuriating, impenetrable) clamshell package. The image was recognizable, but the colors were all out of whack. Thumping the camera made them change, so I assume it was some sort of mechanical interconnect problem. I took that one back and got a replacement.
The big problem with the cameras turned out to be RFI. Once I had the whole payload together, I found that RF from the transmitter was getting into the control lines and causing the cameras to freak out. Sometimes it'd just cause them to take video clips or go into self-timer mode, but other times it'd delete the entire memory card. Definitely something I didn't want happening in flight!
My last-minute fix involved cutting apart the carefully soldered cables to add several small ferrite beads. I wasn't entirely convinced they'd work, but they appear to have done the job.
Launch Site and Crew
Launching from home - the central coast of California - was ruled out early on. It'd be too easy for the balloon to blow out to sea, and even if it went the right direction, an early landing would likely drop it in the middle of the Los Padres forest.
 The Mojave Desert, on the other hand, has plenty of open space. It also happens
to contain one of my family's favorite places to camp -
Red Rock Canyon State Park,
located about 30 miles north of Mojave on Highway 14. It was decided to combine
the launch and a 3-day camping trip.
The Mojave Desert, on the other hand, has plenty of open space. It also happens
to contain one of my family's favorite places to camp -
Red Rock Canyon State Park,
located about 30 miles north of Mojave on Highway 14. It was decided to combine
the launch and a 3-day camping trip.
We originally hoped to launch from within the park itself, but the supervising ranger shot down that idea. Park rules apparently prohibit the launch of any aircraft, and while I'm not entirely sure that a 3-pound balloon qualifies as an aircraft, the decision was made that the launch would not be allowed without a special event permit and the associated fee.
Fortunately, the park is surrounded by thousands of acres of public land, and finding a new launch site was simply a matter of moving a few miles up the road. The entire area also happens to be part of a huge expanse of restricted airspace used for all sorts of military opearations, but amazingly enough, the Air Force turned out to be more accomodating and easier to work with than the park service.
Several friends who had intended to come along had to cancel for various reasons, so the launch crew was initially composed of myself (N1VG), my sister Keri (N6TME) and her husband Stephen (KF6ODZ), my son Charlie (KI6FAL), age 10, my daughter Allison, age 7, and my girlfriend Tory.
The Launch
Our first launch attempt was on Saturday, November 11. We drove a few miles up Highway 14 and found a good spot, but we got a late start and by the time we were ready to go the wind was too strong for a safe launch. We scrubbed for the day and drove back to the campground.
 Later in the day, my old friend Sean, N6UQD, showed up at the campground. I'd
invited him along but apparently I'd already left for the desert by the time he
replied to my email. His arrival was a pleasant surprise, and helped offset the
loss of Keri and Stephen when they had to leave for a conference in Las Vegas.
Later in the day, my old friend Sean, N6UQD, showed up at the campground. I'd
invited him along but apparently I'd already left for the desert by the time he
replied to my email. His arrival was a pleasant surprise, and helped offset the
loss of Keri and Stephen when they had to leave for a conference in Las Vegas.
On Sunday morning we got an earlier start. By 8:50 we had the payload sealed and the cameras running. As we were about to start setting up for inflation, a rather grim looking park ranger pulled up in an SUV and informed us that our map was wrong and that this side of the highway was inside the park, and that we'd have to move to a turnout a hundred yards away.
Since the payload was already sealed, I just shut down the cameras by remote command to save batteries and storage space, and we threw everything back in the truck as quickly as we could and set up again on the other side of 14.
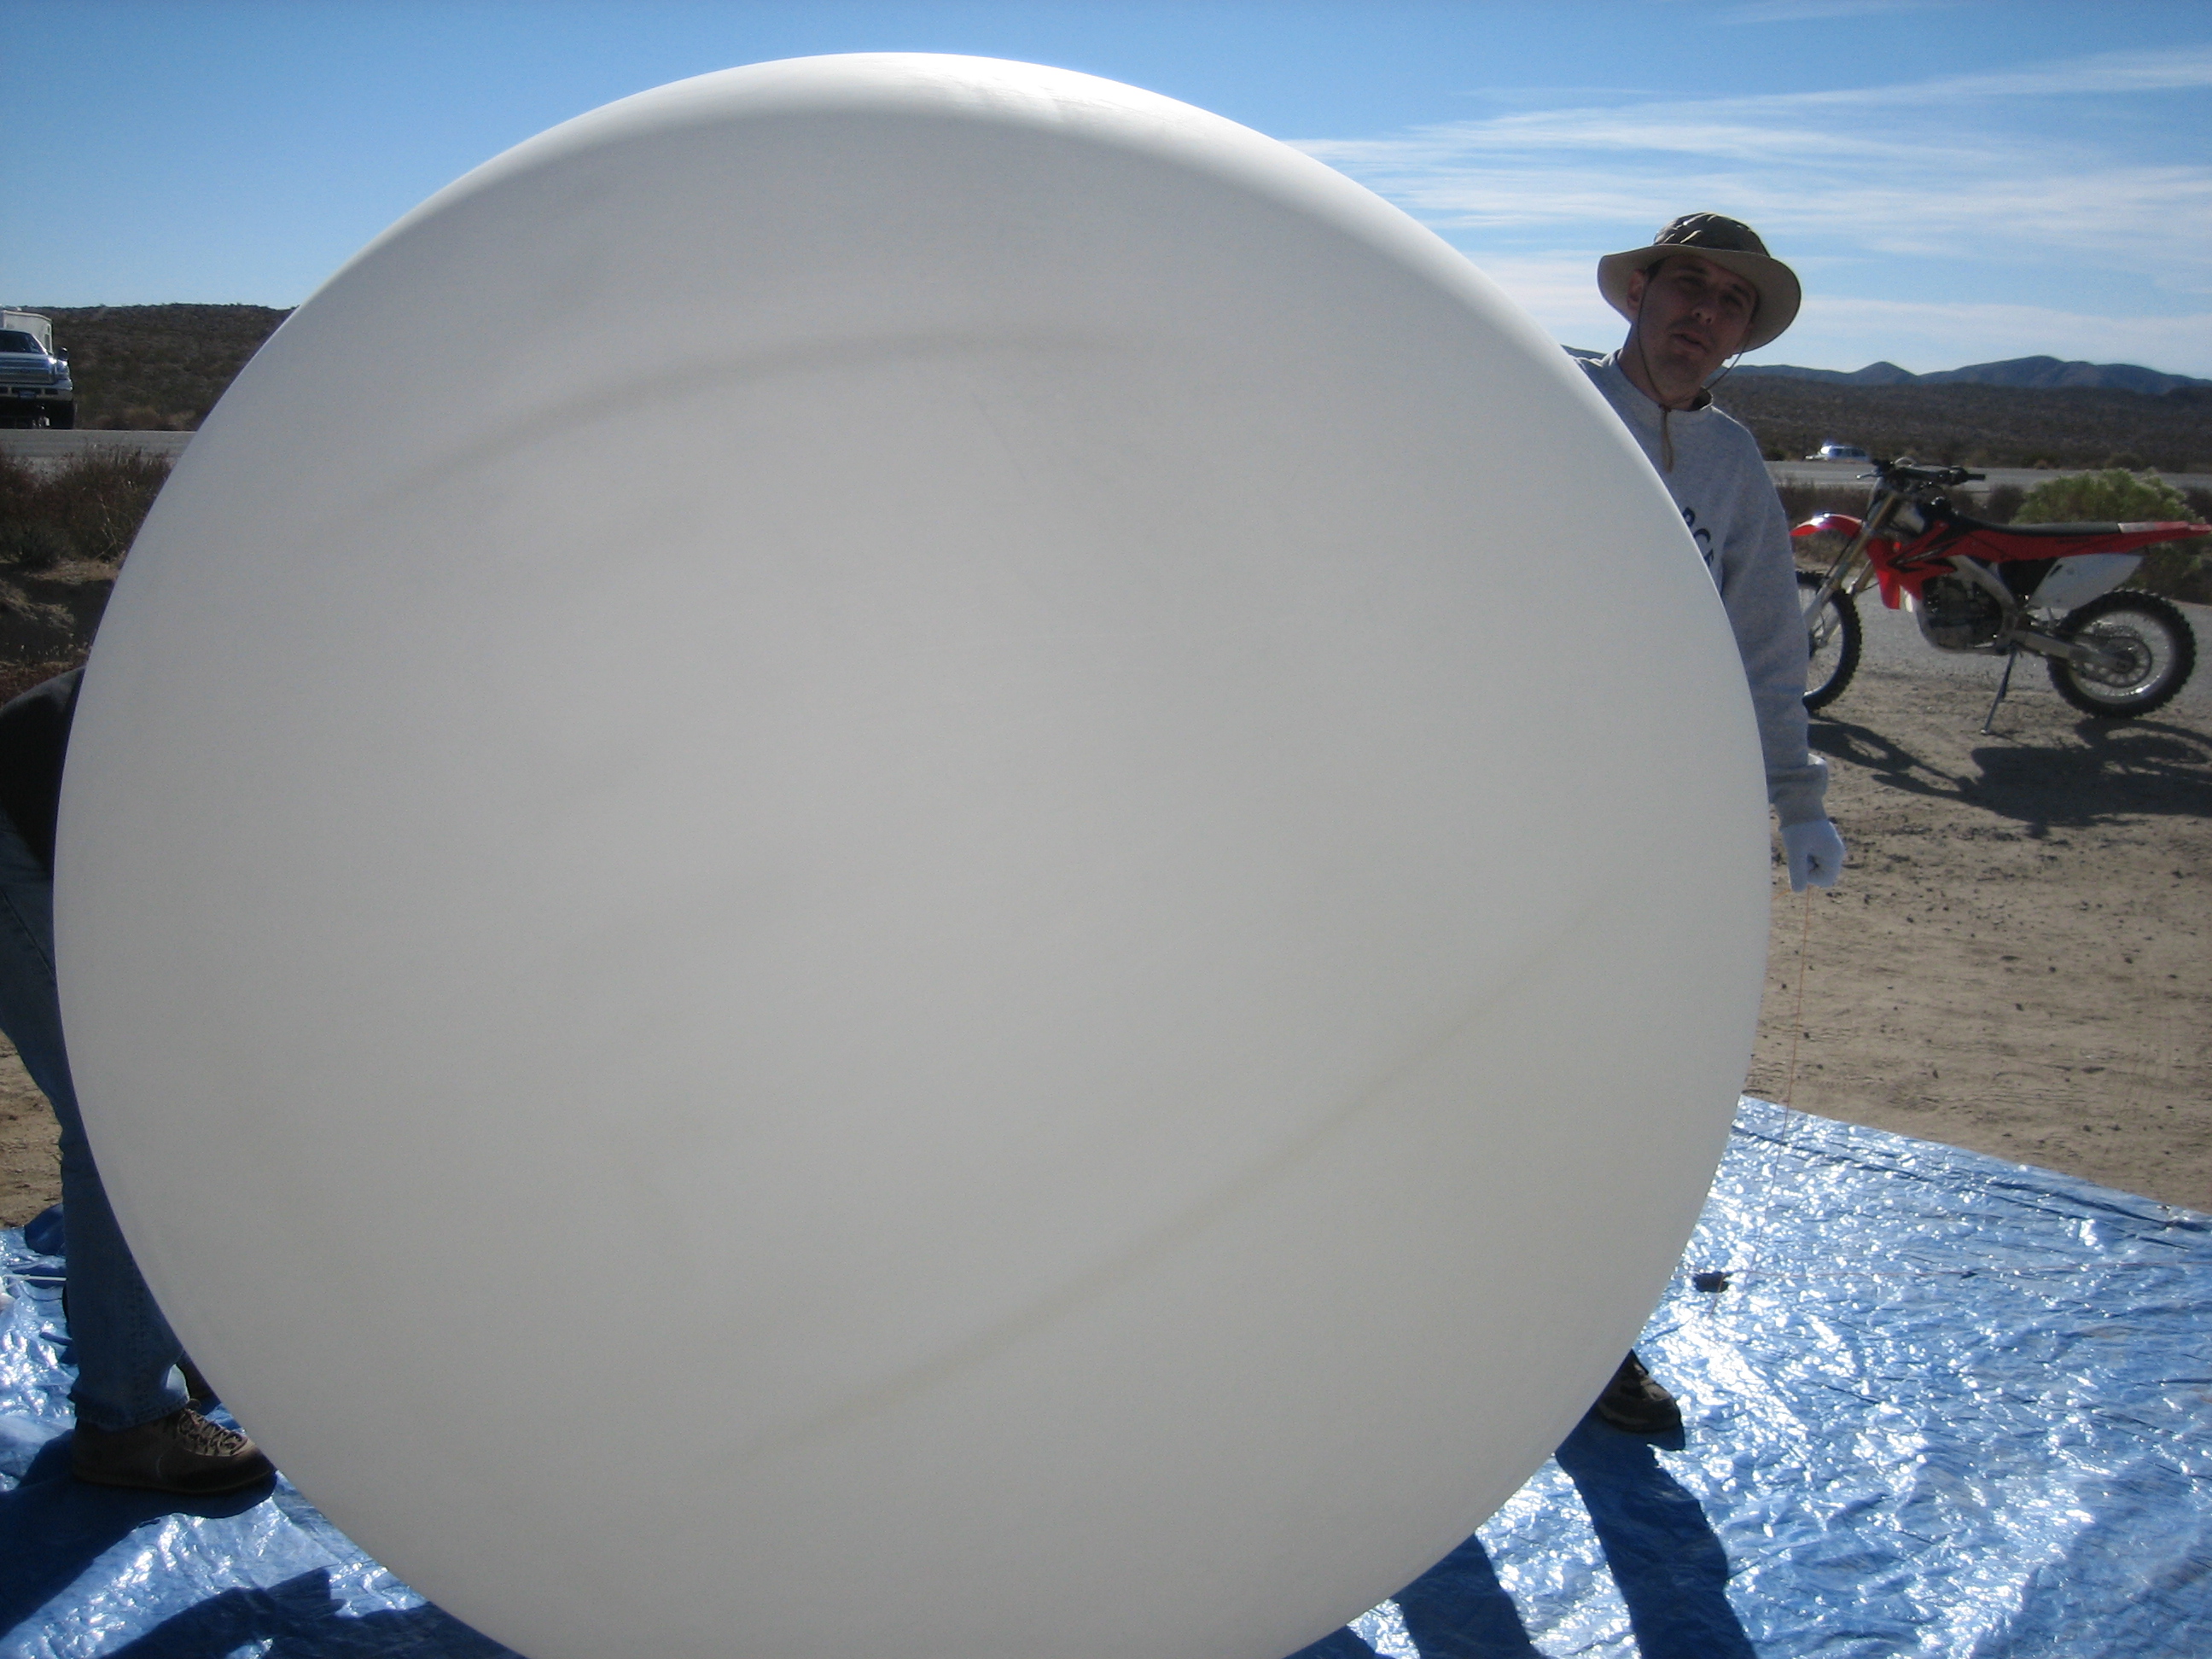
The new site wasn't quite as nice as the old one, being surrounded by barbed wire and
all, but the wind was picking up again and we needed to launch quickly. Inflation
went smoothly, except for the fact that the wind was bouncing the balloon around
too much to get a good measurement of the free lift. I'd calculated that it'd
require about half of the helium in the 'K' cylinder to get the lift we needed,
so we just filled until the gauge on the regulator read about half what it had
when we started.
Release went OK, but just barely (launch video, 4 MB WMV). The wind was stronger than we'd wanted, and we had to jog with the balloon a bit as it took off. I gave the payload a final toss as I hit the first fence and it cleared the fence beyond by a foot or so.
My laptop (a newer Dell model running Xastir/Cygwin under Windows XP) had been acting up for a day or so, running very slowly with the fan running all the time despite having a low CPU load. The KPC-3 I'd intended to use with it was also giving me trouble, so I gave up entirely on the laptop and went with a Tracker2 instead.
This particular Tracker2 was a T2-135 prototype - a daughter board installed in an Alinco DR-135T mobile rig. I used my TH-D7A handheld (which I also used to control the payload) to reconfigure it from KISS mode to waypoint output mode, and hooked up my Garmin GPSmap 60CS. The balloon payload immediately showed up as a waypoint on the map screen, with course, speed, altitude, rate of climb, temperature, and voltage displayed on the waypoint detail page (screenshot).
I queried the payload a couple of times after it started its ascent to make sure all was well, and then we loaded everything up and drove back down highway 14. Charlie rode along in Sean's Subaru to handle car-to-car communications, while the rest of us piled into the Durango. The balloon initially headed south, and we overtook it several miles down the road when it had reached an altitude of about 20,000 feet.
 We drove on ahead to Mojave and stopped for a late breakfast/early lunch, and watched the
position updates on the D7. We also fired up Sean's laptop to watch the track online - cell
phone coverage is spotty out there, but in Mojave it's not bad.
We drove on ahead to Mojave and stopped for a late breakfast/early lunch, and watched the
position updates on the D7. We also fired up Sean's laptop to watch the track online - cell
phone coverage is spotty out there, but in Mojave it's not bad.
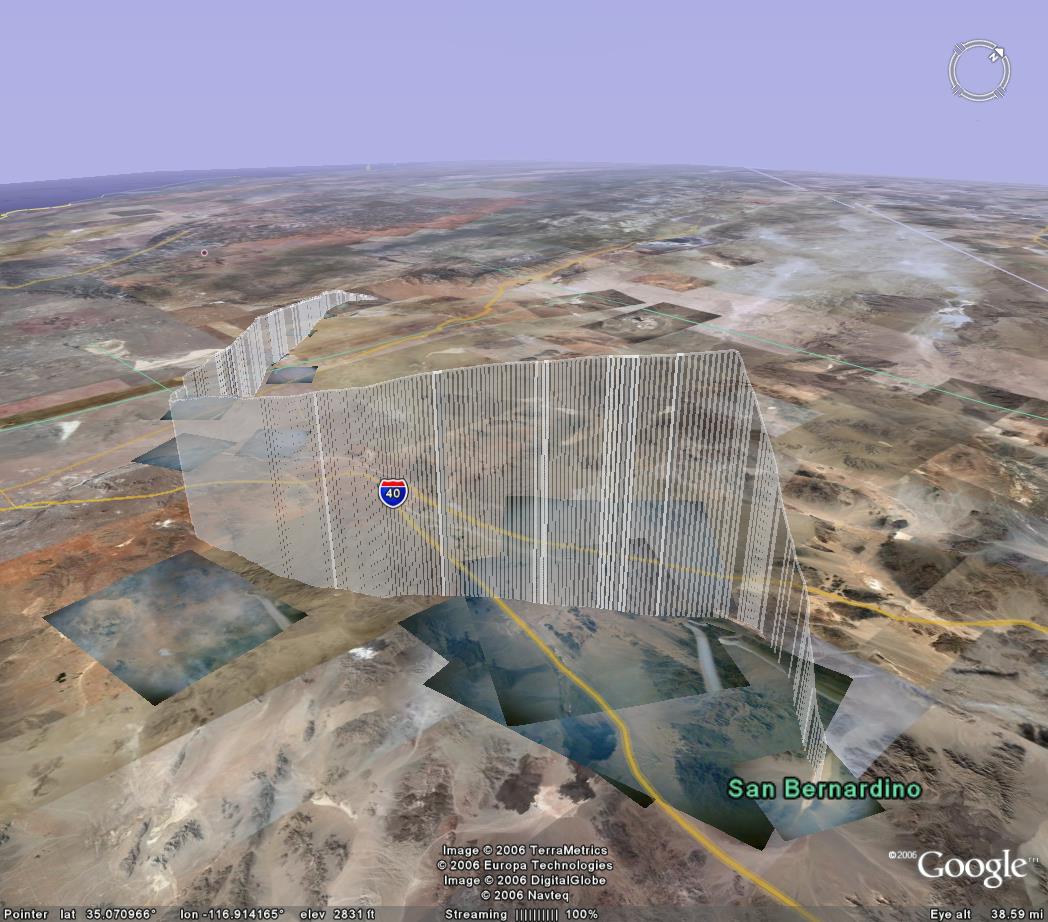
After we'd eaten we were back on the road, chasing the balloon east along highway 58 this time. As we drove into Barstow, we could see that it was heading right for Interstate 15. We'd just made the decision to take I-15 when the balloon, now at an altitude of over 106,000 feet, finally burst and started its descent.
As the balloon dropped below 70,000 feet, its direction shifted suddenly southeast, taking it back toward Interstate 40. At 25,000 feet, it was moving over the ground at 80 miles per hour and descending at more than 3,000 feet per minute.
The last position report I received on the T2-135 showed the balloon at about 20,000 feet. We got another few position reports online, ending at an altitude of only 3,091 feet, or about 1,800 feet above ground level at the landing site.
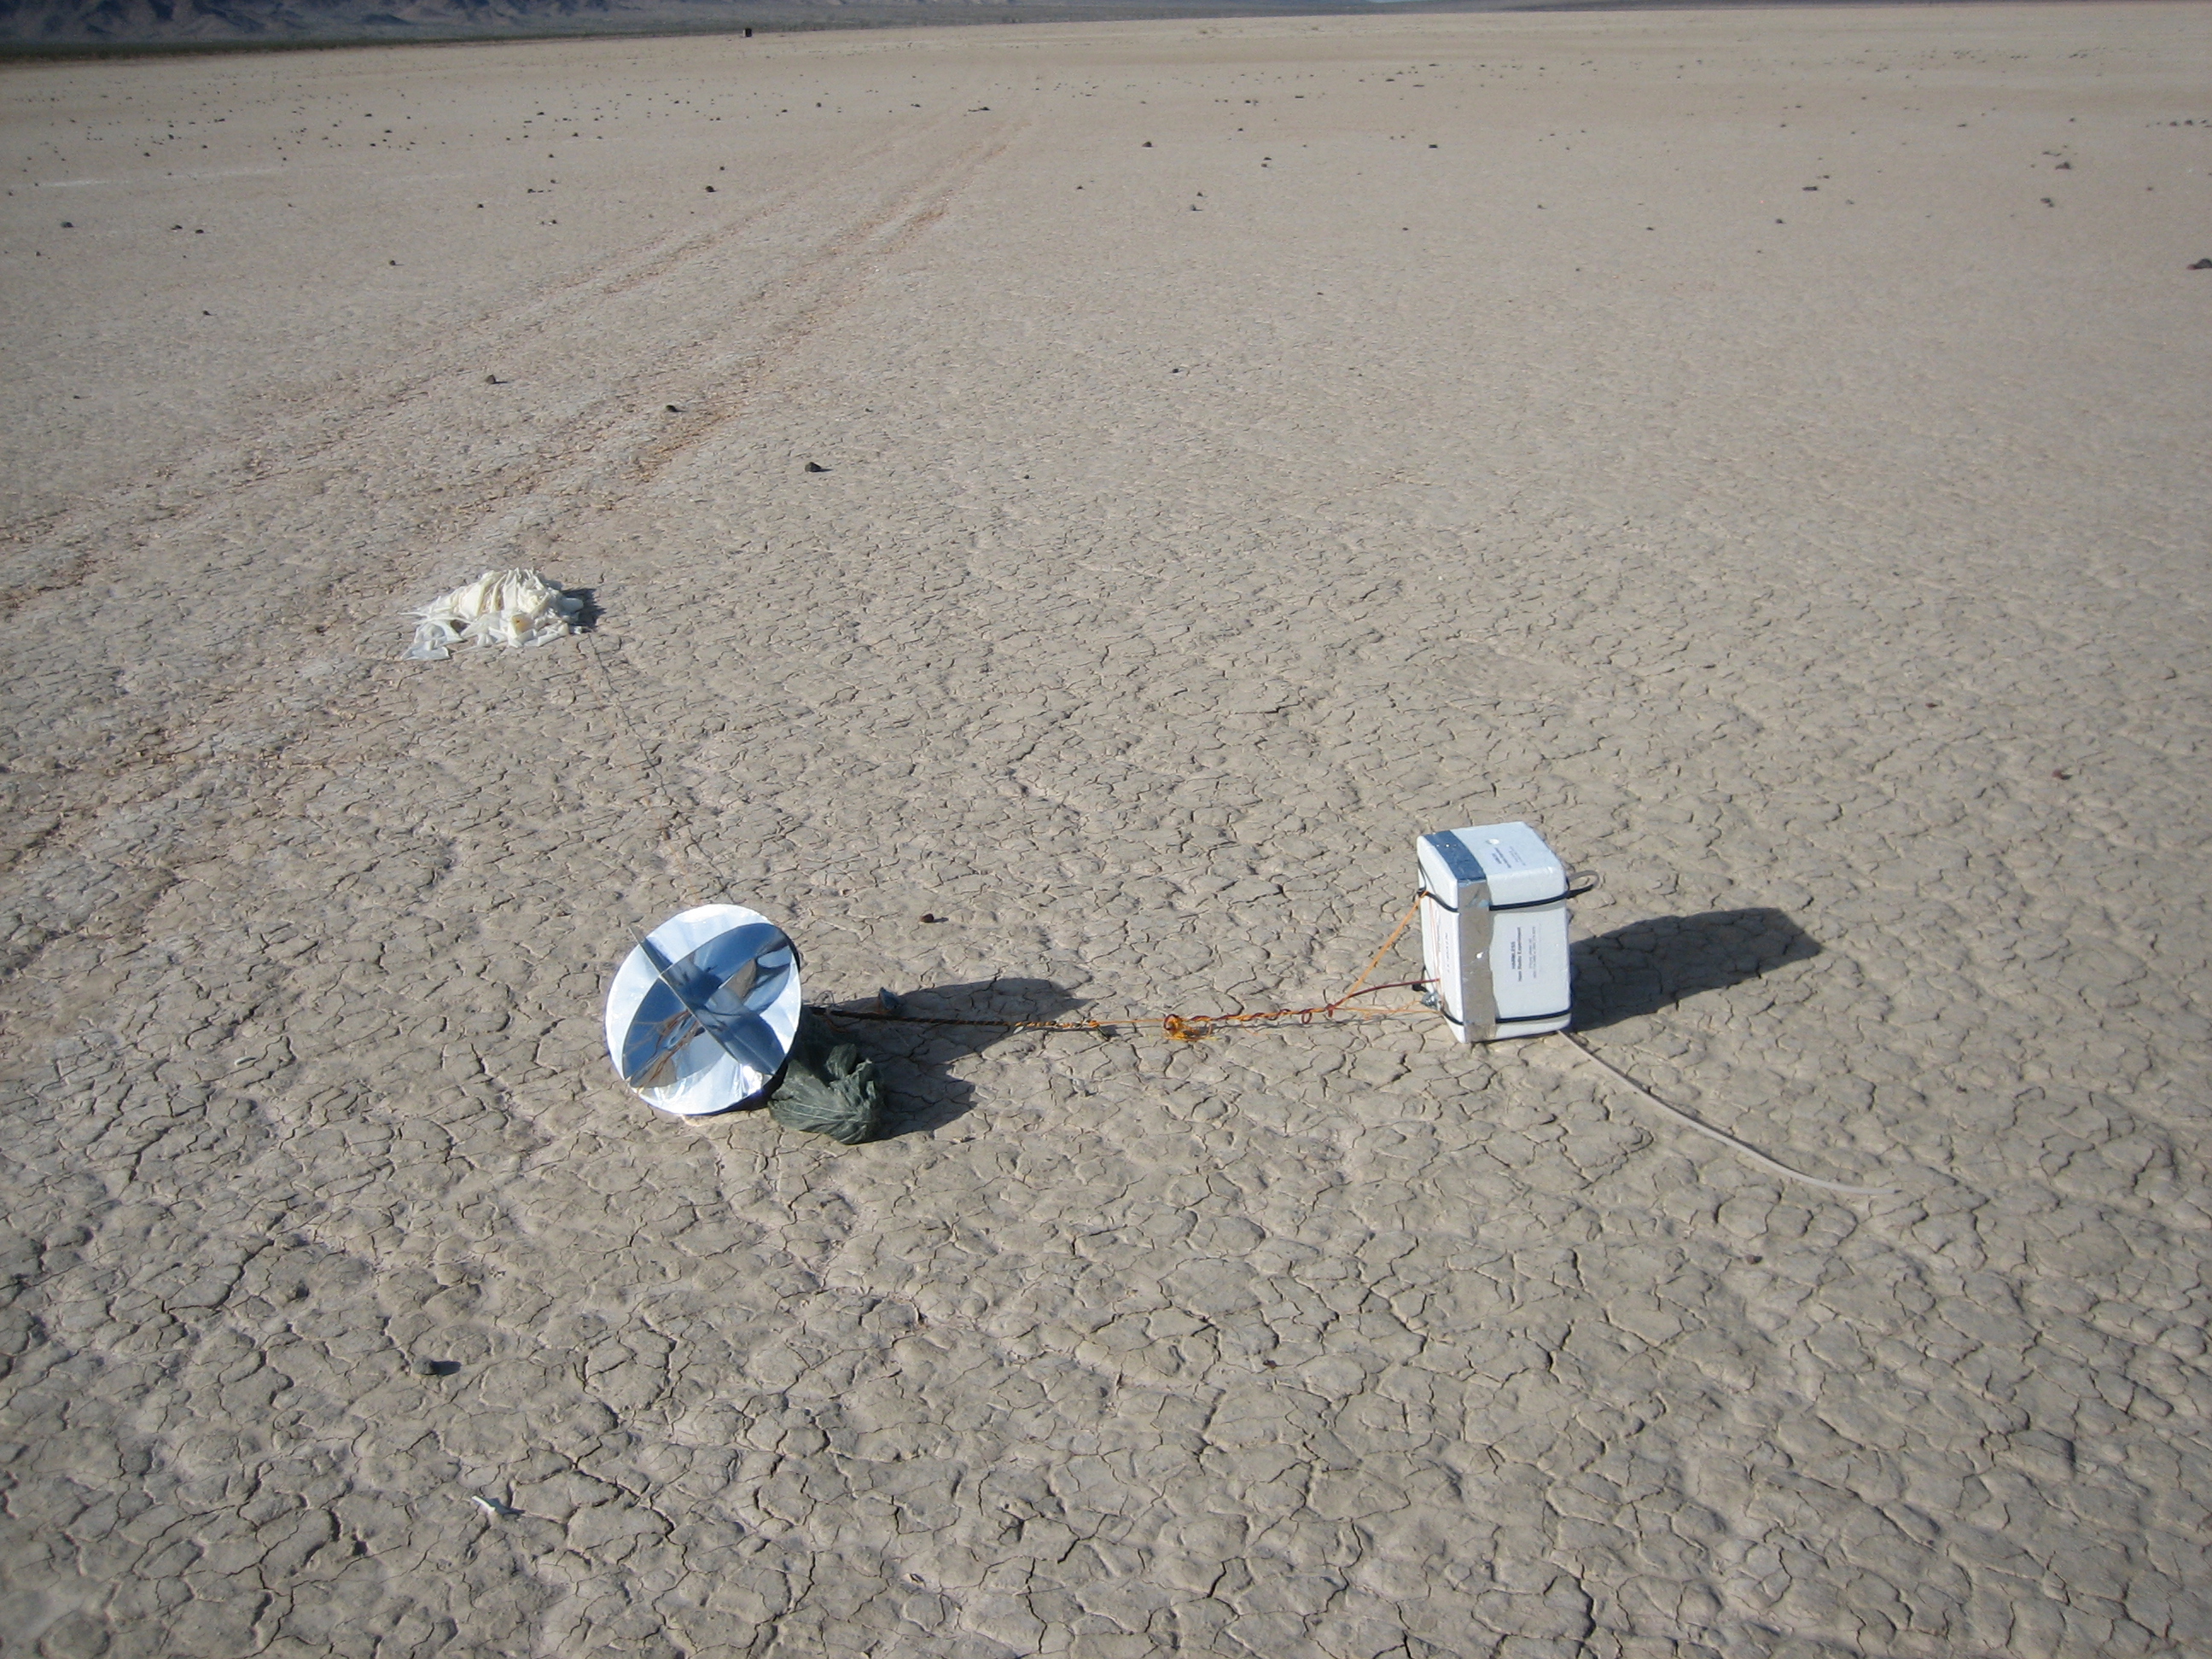
 That last position report put the landing site in the middle of the Broadwell dry lake bed. What a
relief - with hundreds of square miles of inaccessible mountains all around, it came down where we
could drive right to it. We took I-40 to Ludlow and bounced along Crucero Road for a few miles until
we reached the lake. Radio direction finding turned out not to be necessary - the payload and silver radar
reflector were clearly visible from the road.
That last position report put the landing site in the middle of the Broadwell dry lake bed. What a
relief - with hundreds of square miles of inaccessible mountains all around, it came down where we
could drive right to it. We took I-40 to Ludlow and bounced along Crucero Road for a few miles until
we reached the lake. Radio direction finding turned out not to be necessary - the payload and silver radar
reflector were clearly visible from the road.
I decided to walk the last stretch from the road to the landing site, mostly out of concern that we'd accidentally drive over some critical piece of hardware that might have spilled out upon landing. As I got closer, it appeared that the foam housing of the payload had broken apart - which wouldn't have been surprising, given the descent speeds we'd seen. When we got there, though, it turned out that the fragments weren't part of the payload at all, but rather bits of ceramic that had been out there probably for years.
The payload itself was intact, with just a few scrapes. The horizontal camera had popped out of place, and the impact had been hard enough to leave an imprint of several components 1/4" deep in the inside of the housing, but it was still transmitting, and the horizontal camera was still trying to take pictures despite a full memory card.
 As soon as we got the payload back to the truck, I pulled the memory cards from the cameras and
loaded them up on the (now functional) laptop. Apparently my last-minute fixes worked - the two
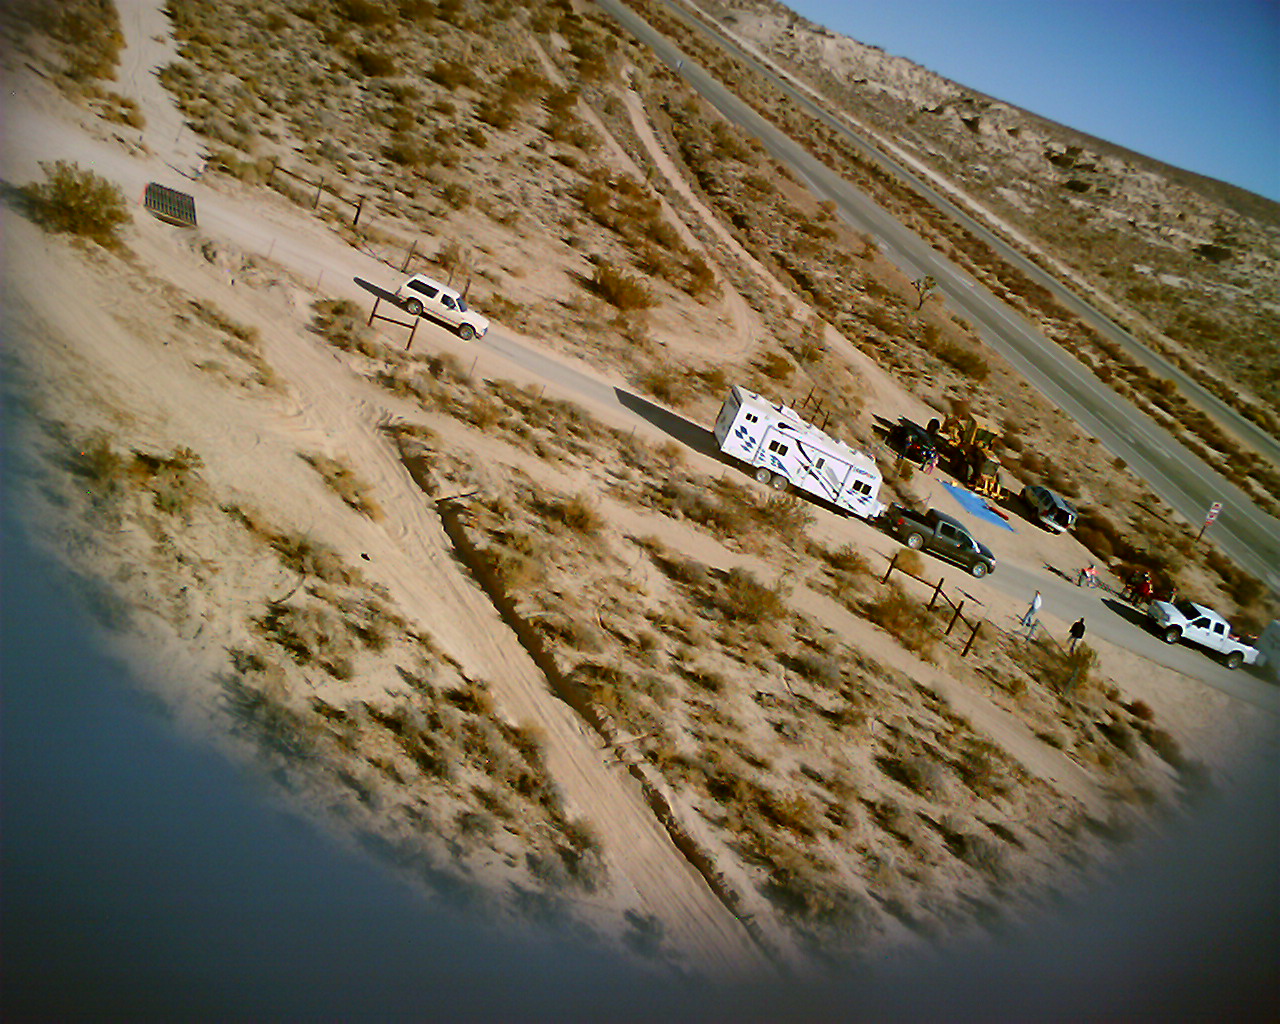
cameras took more than 1,100 pictures from liftoff to touchdown. The downward-facing camera
stopped taking pictures during freefall, and I'm still not exactly sure why. The side-facing
camera snapped pictures all the way down, but not long after burst it started exhibiting the
same weird colors as the defective camera I had replaced. So no dramatic pictures of the final
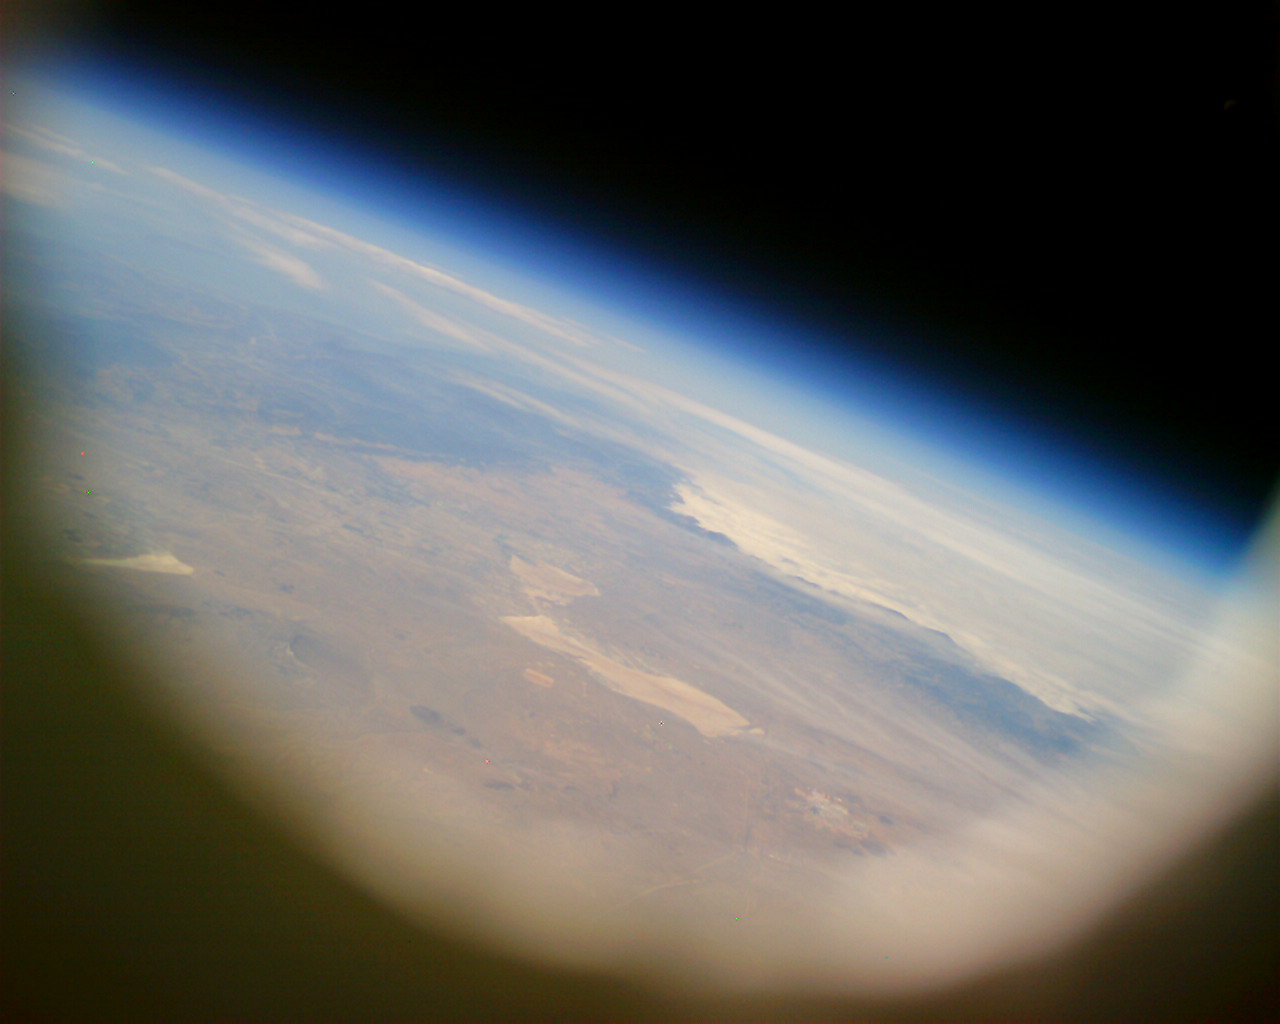
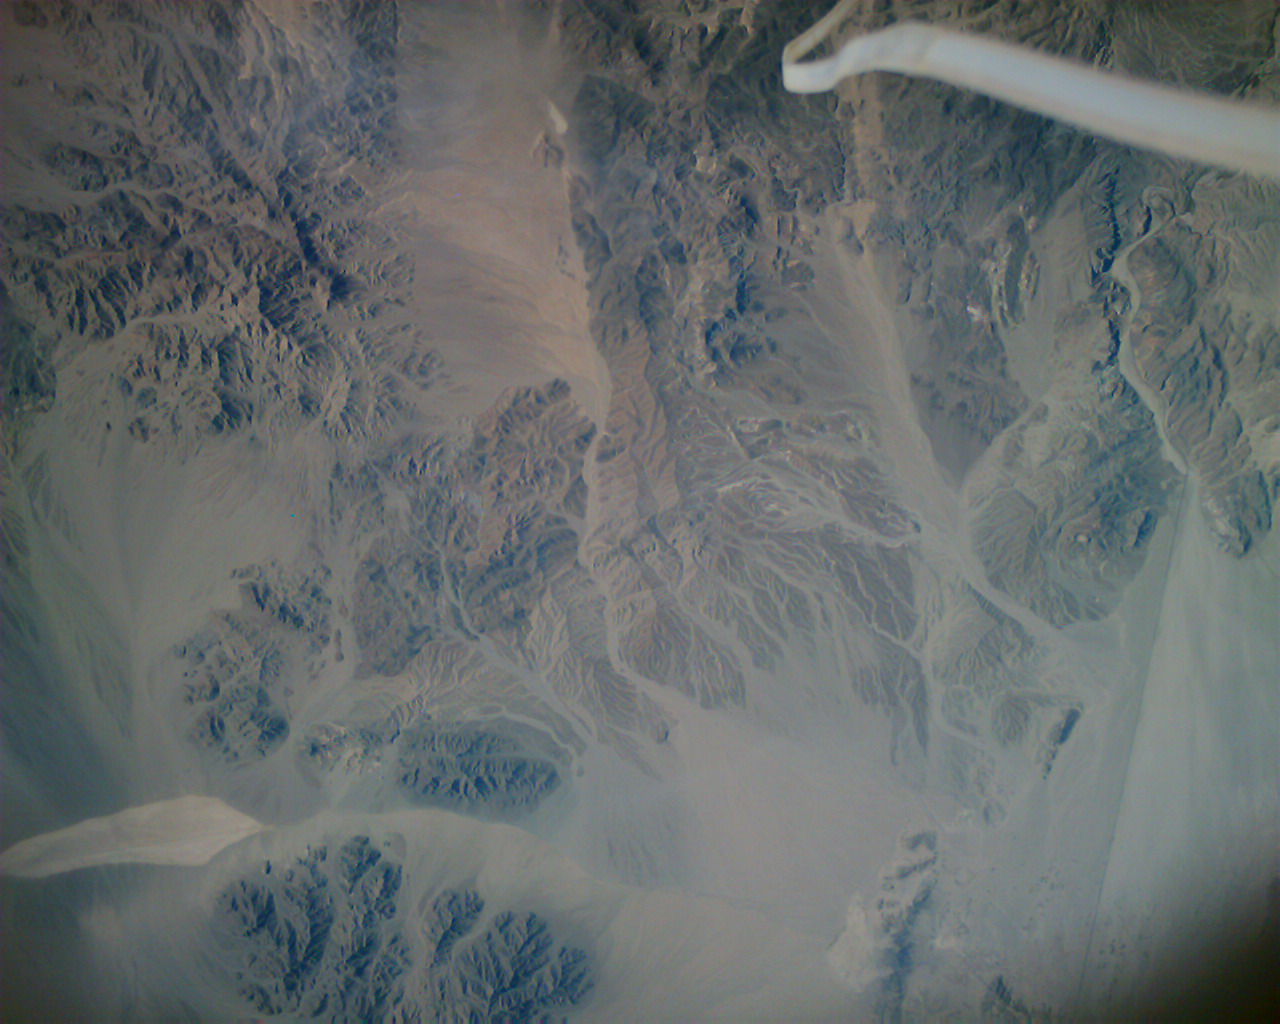
seconds before impact, I'm afraid, but plenty showing black sky and the curvature of the Earth from
an altitude of more than 20 miles. If you look closely, you can even spot the coastline and the
Channel Islands, more than 100 miles away.
As soon as we got the payload back to the truck, I pulled the memory cards from the cameras and
loaded them up on the (now functional) laptop. Apparently my last-minute fixes worked - the two
cameras took more than 1,100 pictures from liftoff to touchdown. The downward-facing camera
stopped taking pictures during freefall, and I'm still not exactly sure why. The side-facing
camera snapped pictures all the way down, but not long after burst it started exhibiting the
same weird colors as the defective camera I had replaced. So no dramatic pictures of the final
seconds before impact, I'm afraid, but plenty showing black sky and the curvature of the Earth from
an altitude of more than 20 miles. If you look closely, you can even spot the coastline and the
Channel Islands, more than 100 miles away.
Overall, the project was a resounding success. I'm almost afraid to try again for fear that I can't possibly get that lucky twice in a row!
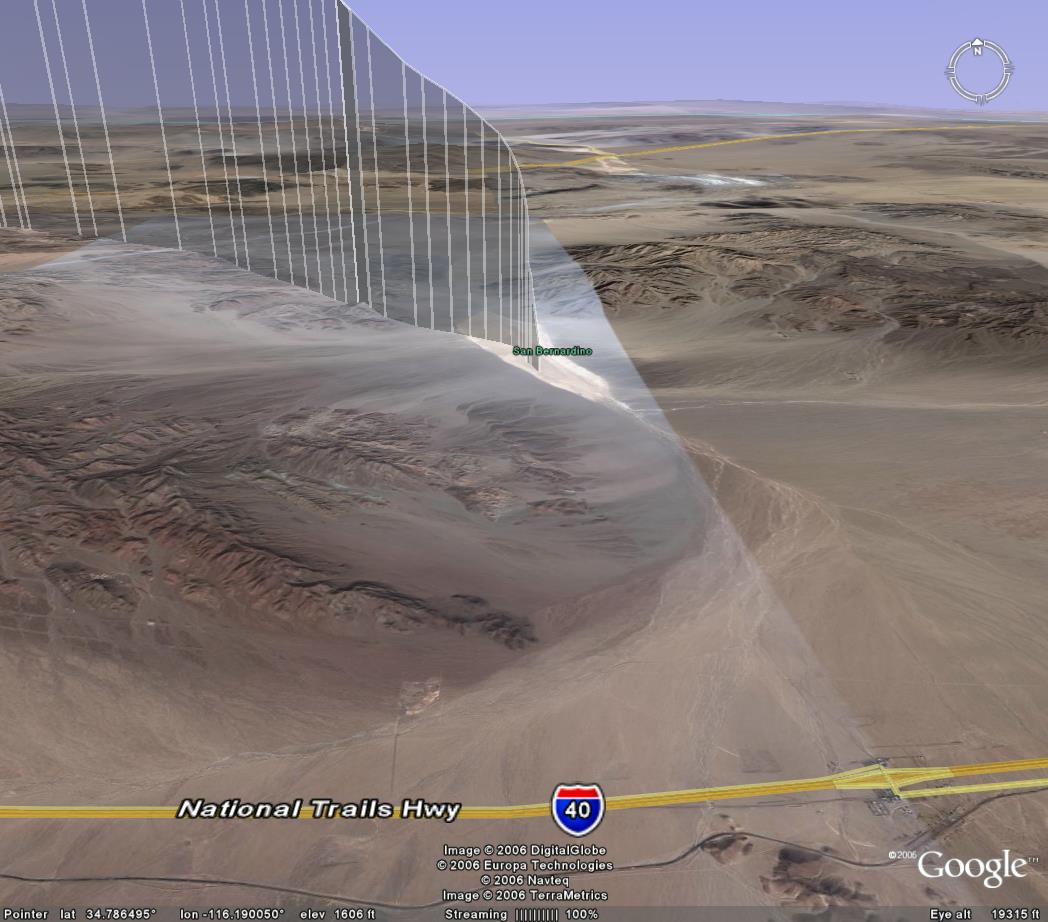
Google Earth .kml track of flight
scott@n1vg.net
![]()